Signing Up for Dev Sandbox
Do you like testing in prod? I definitely don’t. Fortunately, when creating an app for the Slack Platform, I don’t have to. Signing up for the Slack Developer Program gets me my very own Developer Sandbox. That way I test my app against real behavior without the real problems of breaking production.
The Slack Developer Program sets you up for success in developing your app both personally and technically. You get the most recent development updates to know what’s changed and what’s new. It also provides you resources to learn directly from creators and experts to get first-hand implementation insights, learn best practices, and more. Then you can test out what you’ve learned and what you want to innovate on in a dedicated Enterprise Grid sandbox.
Using a developer sandbox gives me access to a free environment that can be used to build against Slack features safely and securely. After signing up, creating a sandbox gives me a secure developer environment where I can test my app against my org’s compliance and data boundaries. It can also enable me to work with my teammates in an environment that isn’t production. Working in a sandbox environment makes you friends while testing in prod makes everyone sad. So let’s not do that.
When logging in to my workspace, I use a time-limited, single-use code (PIN) sent to my verified work email. This login experience is passwordless, fast to deploy, and bound to my corporate identity (e.g., @mycompany.com). It offers strong brute-force protections (e.g., short TTL, single-use, exponential throttling) without a need for setting up SSO or IdP per workspace. This provides a streamlined, yet secure, alternative to configuring SSO for each sandbox, saving me time and drama.
Because I want to play nice with others, I can define who can join my sandboxes with domain-based allow lists. For example, only “@mycompany.com” users can be added and no external emails are allowed.
For additional security, users cannot change their email address inside the sandbox. Their identity stays tied to my organization, reducing risk and keeping access aligned with my company’s policies. This also means I can block or limit guest users in developer sandboxes to maintain a secure internal environment.
Since I’m building something for my company, I want to be able to mimic the baseline policy settings from my parent Enterprise organization automatically. This way I can test against needed behavior but also have restrictions to ensure consistent governance.
Using the developer sandbox also streamlines provisioning to eliminate manual reviews. Admins can configure default resolution rules (e.g., auto-approve or auto-deny) for incoming sandbox requests, reducing friction and saving time.
So how do you sign up? Easy:
- Navigate to the Slack Developer Program page. Click Join the Program.
- Fill out the registration form and click Submit.
- You’ll receive an email confirmation to activate your account. Click Activate Developer Account from the email; you’ll then be directed to the Dashboard page.
Then you’re in! Next up, using your sandbox!
Creating Your Sandbox
Remember how I said it’s free? Don’t panic, it’s still free. However, if you’re not a member of a paid plan, you‘ll be prompted to provide a payment method. You won’t be charged since this process is only used for identity verification purposes.
Once you’ve signed up, head to the Sandboxes tab of the Slack API. You’ll click, Provision Sandbox.

If you belong to an Enterprise organization and your Org Admin has enabled Allow developer sandboxes > Require approval for sandbox provisioning within your organization’s settings, you’ll need to make a request before you can provision a sandbox. If not, you’ll go on to the next step.
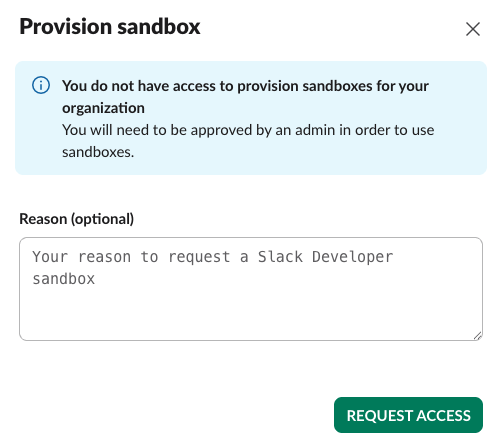
After you click Request Access, your request will be submitted to your Org Admin.
Your Org Admin will review your request and, if approved, you’ll receive a Slackbot notification that you can go ahead and provision your sandbox. If they deny your request or they have disabled sandbox provisioning for your organization, you’ll see the relevant message displayed on both your Dashboard and Sandboxes pages.
When your Org Admin approves your sandbox, or if the above doesn’t apply to you, this modal will appear for you to enter the details for your sandbox.
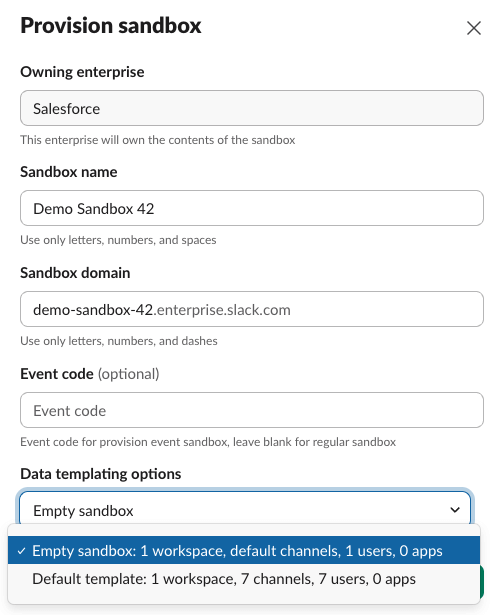
Note the data templating options at the bottom. Here you can choose whether you want an empty sandbox or if you want to load a Slack template into your sandbox.
An empty sandbox gives you 1 workspace and 1 demo user. A Slack template to your sandbox contains 1 workspace, 7 system-created fake users, 7 channels, and system-created threads, replies, and reactions to threads/replies. These two options help you test against the objects and behavior you use without needing to have a complicated setup for the workspace.
Next you’ll click Provision Sandbox again, then click Manage Sandboxes on the next modal.
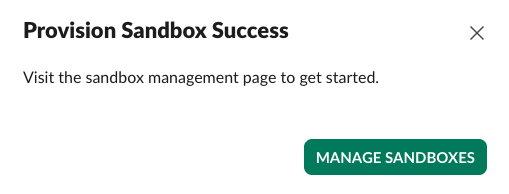
Your sandbox will appear on the Sandboxes page of your developer program page. To access your new sandbox, click its name and log in with your email address and the password you just created. Once you complete verification, the Sandboxes page will show a workspace with the same name as your sandbox.
Now that your sandbox has been successfully provisioned, it’s time to get building! For more details, FAQs, and specifications, check out the developer docs.