This guide will walk you through preparing and deploying a Slack app using Bolt for JavaScript and the Heroku platform. Along the way, we’ll download a Bolt Slack app, prepare it for Heroku, and deploy it.
Deploying to Heroku
⚠️ Using Heroku dynos to complete this tutorial counts towards your usage. Delete your app as soon as you are done to control costs.
When you’re finished, you’ll have this ⚡️Deploying to Heroku app to run, modify, and make your own.
Get a Bolt Slack app
If you haven’t already built your own Bolt app, you can use our Getting Started guide or clone the template app below:
1

git clone https://github.com/slackapi/bolt-js-getting-started-app.git
After you have a Bolt app, navigate to its directory:
1

cd bolt-js-getting-started-app/
Now that you have an app, let’s prepare it for Heroku.
Prepare the app for Heroku
Heroku is a flexible platform that requires some configuration to host your app. In this section, we’ll update your Bolt app to support Heroku.
1. Use a Git repository
Before you can deploy your app to Heroku, you’ll need a Git repository. If you aren’t already using Git, you’ll need to install Git and create a Git repository.
💡 Skip this step if you used
git clonein the previous section because you already have a Git repository.
2. Add a Procfile
Every Heroku app uses a special file called Procfile that tells Heroku how to start your app. The contents of the file will depend on whether or not you are using Socket Mode.
Create a new file called Procfile (without any extension) in your app’s root directory and paste in one of the following, depending on how you’re running your app.
By default, a Bolt Slack app will be started as a web server with a public web address:
1

web: node app.js
Apps using Socket Mode are started as workers that do not listen to a port:
1

worker: node app.js
Once you’ve saved the file, let’s commit it to your Git repository:
1
2

git add Procfile
git commit -m "Add Procfile"
💡 Are you following this guide with an existing Bolt app? If so, please review the guide on preparing a codebase for Heroku to listen on the correct port.
Set up the Heroku tools
Now we can set up the Heroku tools on your local machine. These tools will help you manage, deploy, and debug your app on Heroku’s platform.
1. Install the Heroku CLI
The Heroku tools are available as a Command Line Interface (CLI). Go ahead and install the Heroku CLI for macOS, Windows, or Linux. On macOS, you can run the command:
1

brew install heroku/brew/heroku
Once the install is complete, we can test the Heroku CLI by displaying all of the wonderful commands available to you:
1

heroku help
💡 If the
herokucommand is not found, refresh your path by opening a new terminal session/tab.
2. Log into the Heroku CLI
The Heroku CLI connects your local machine with your Heroku account. Sign up for a free Heroku account and then log into the Heroku CLI with the following command:
1

heroku login
💡 If you’re behind a firewall, you may need to set the proxy environment variables for the Heroku CLI.
3. Confirm you’re logged into the Heroku CLI
Check that you’re logged in by displaying the account currently connected to your Heroku CLI:
1

heroku auth:whoami
You should now be set up with the Heroku tools! Let’s move on to the exciting step of creating an app on Heroku.
Create an app on Heroku
It’s time to create a Heroku app using the tools that you just installed. When you create an app, you can choose a unique name or have it randomly generated.
Creating new Heroku apps will use your existing Heroku plan subscription. When getting started or deploying many small apps, we recommend starting with Heroku’s low-cost Eco Dyno plan.
💡 Eligible students can apply for platform credits through the Heroku for GitHub Student program.
1. Create an app on Heroku
Create an app on Heroku with a unique name:
1

heroku create my-unique-bolt-app-name
or, have some fun with a random name:
1
2
3

heroku create
# Creating sharp-rain-871... done, stack is heroku-18
# https://sharp-rain-871.herokuapp.com/ | https://git.heroku.com/sharp-rain-871.git
💡 You can rename a Heroku app at any time, but you may change your Git remote and public web address.
After your app is created, you’ll be given some information that we’ll use in the upcoming sections. In the example above:
- App name is
sharp-rain-871 - Web address is
https://sharp-rain-871.herokuapp.com/ - Empty Git remote is
https://git.heroku.com/sharp-rain-871.git
2. Confirm Heroku Git remote
The Heroku CLI automatically adds a Git remote called heroku to your local repository. You can list your Git remotes to confirm heroku exists:
1
2
3

git remote -v
# heroku	https://git.heroku.com/sharp-rain-871.git (fetch)
# heroku	https://git.heroku.com/sharp-rain-871.git (push)
3. Set environment variables on Heroku
Now you’ll need to add your Slack app credentials to your Heroku app:
1
2

heroku config:set SLACK_SIGNING_SECRET=<your-signing-secret>
heroku config:set SLACK_BOT_TOKEN=xoxb-<your-bot-token>
💡 If you don’t know where to find your credentials, please read about exporting your signing secret and token in the Getting Started guide.
Now that we have prepared your local app and created a Heroku app, the next step is to deploy it!
Deploy the app
To deploy the app, we’re going to push your local code to Heroku, update your Slack app’s settings, and say “hello” to your Heroku app. ✨
1. Deploy the app to Heroku
When deploying an app to Heroku, you’ll typically use the git push command. This will push your code from your local repository to your heroku remote repository.
You can now deploy your app with the command:
1

git push heroku main
💡 Heroku deploys code that’s pushed to the master or main branches. Pushing to other branches will not trigger a deployment.
Finally, we need to start a web server instance using the Heroku CLI:
1

heroku ps:scale web=1
2. Update your Slack app’s settings
Now we need to use your Heroku web address as your Request URL, which is where Slack will send events and actions.
Get your Heroku web address with the following command:
1
2
3

heroku info
# ...
# Web URL: https://sharp-rain-871.herokuapp.com/
In our example, the web address is https://sharp-rain-871.herokuapp.com/.
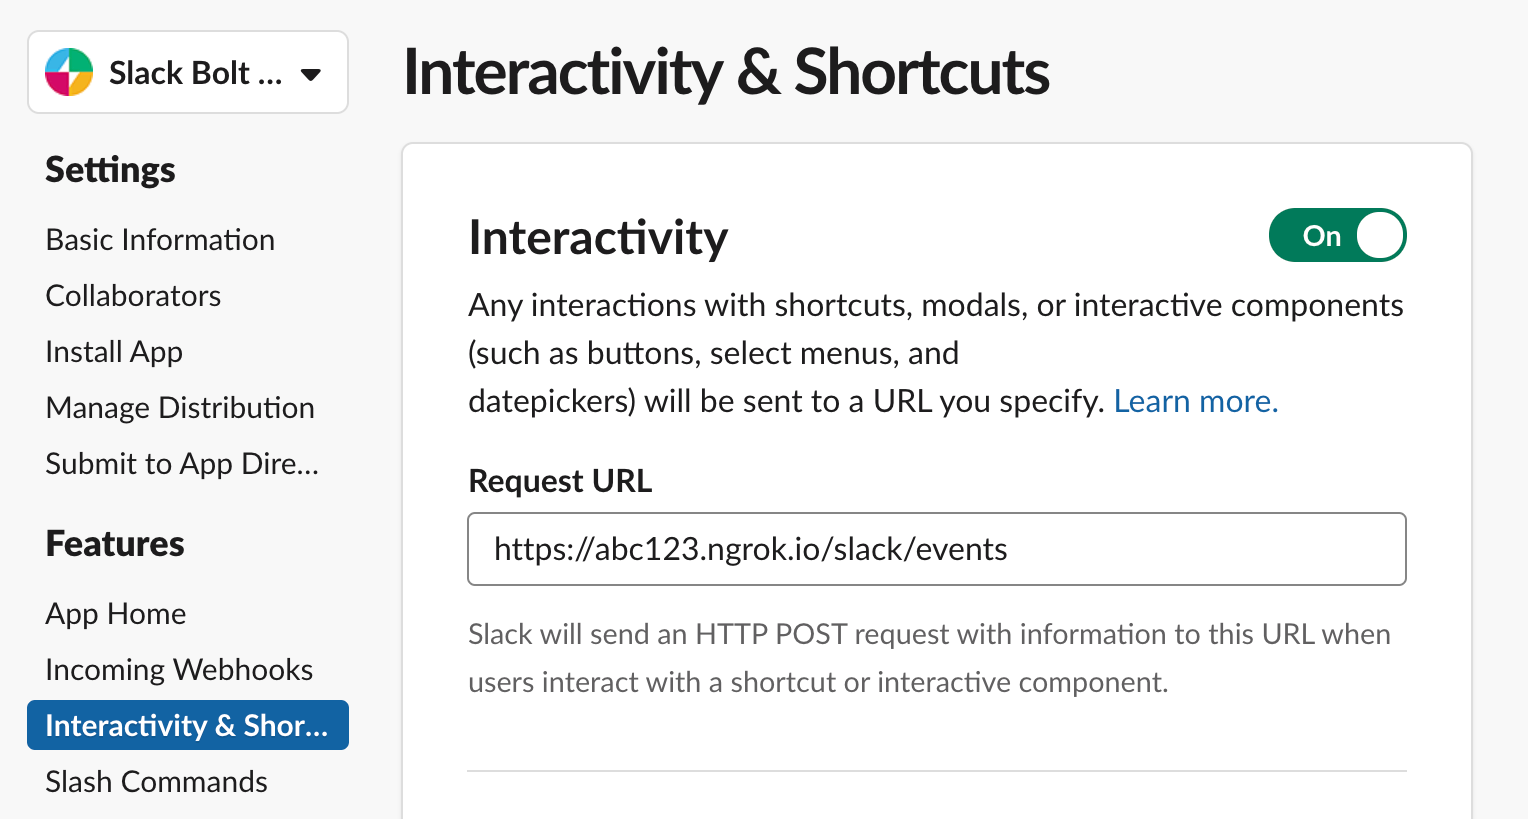
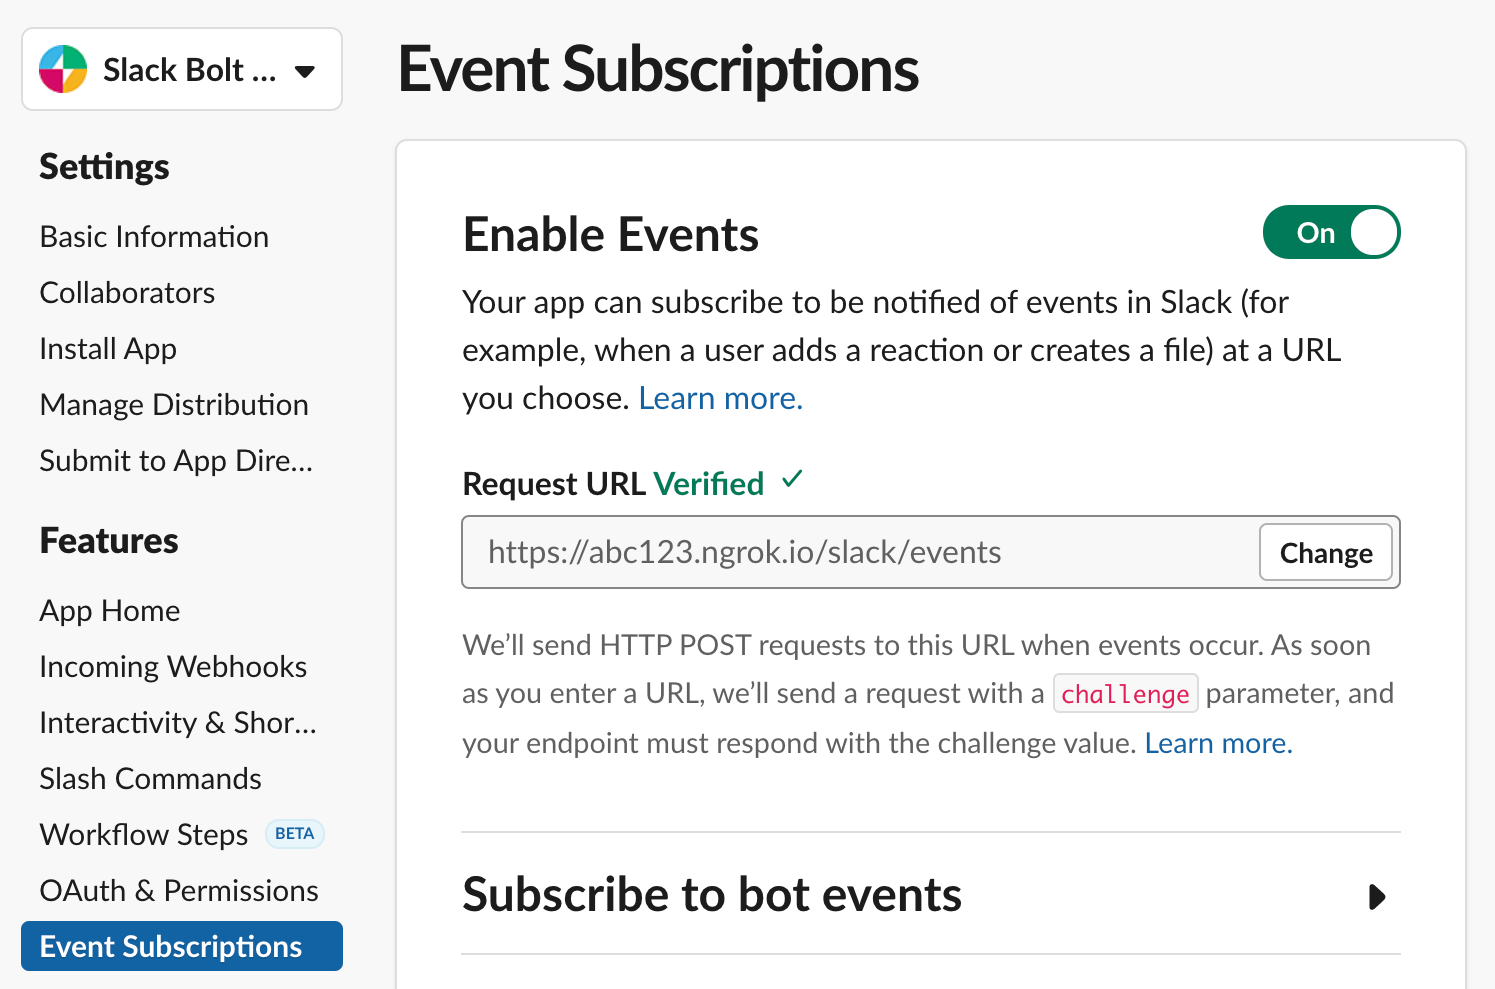
Head over to the Slack App page and select your app name. Next, we’ll update your Request URL in two locations to be your web address.
💡 Your Request URL ends with
/slack/events, such ashttps://sharp-rain-871.herokuapp.com/slack/events.
First, select Interactivity & Shortcuts from the side and update the Request URL:

Second, select Event Subscriptions from the side and update the Request URL:

💡 Heroku Eco Dyno apps sleep when inactive. 💤 If your verification fails, please try it again immediately.
3. Test your Slack app
Your app is now deployed and Slack is updated, so let’s try it out!
Open a Slack channel that your app has joined and say “hello” (lower-case). Just like in the Getting Started guide, your app should respond back. If you don’t receive a response, check your Request URL and try again.
Deploy an update
As you continue building your Slack app, you’ll need to deploy updates. A common flow is to make a change, commit it, and then push it to Heroku.
Let’s get a feel for this by updating your app to respond to a “goodbye” message. Add the following code to app.js (source code on GitHub):
1
2
3
4
5

// Listens to incoming messages that contain "goodbye"
app.message('goodbye', async ({ message, say }) => {
  // say() sends a message to the channel where the event was triggered
  await say(`See ya later, <@${message.user}> :wave:`);
});
Commit the changes to your local Git repository:
1

git commit -am "Say 'goodbye' to a person"
Deploy the update by pushing to your heroku remote:
1

git push heroku main
When the deploy is complete, you can open a Slack channel that your app has joined and say “goodbye” (lower-case). You should see a friendly farewell from your Slack app.
Next steps
You just deployed your first ⚡️Bolt for JavaScript app to Heroku! 🚀
Now that you’ve deployed a basic app, you can start exploring how to customize and monitor it. Here are some ideas of what to explore next:
- Brush up on how Heroku works and understand the limitations of a Heroku Eco Dyno app.
- Extend your app with Bolt’s Basic Concepts and Heroku’s Add-ons.
- Learn about logging in Bolt’s Advanced Concepts and how to view log messages in Heroku.
- Get ready for primetime with how to scale your Heroku app.