Create a daily fact generator using a custom function and Workflow Builder
Do you have a monthly, weekly, or daily report you would like to automate? If the data you need is accessible with an API, with just a little programming you can open up a whole new world of unlimited possibilities!
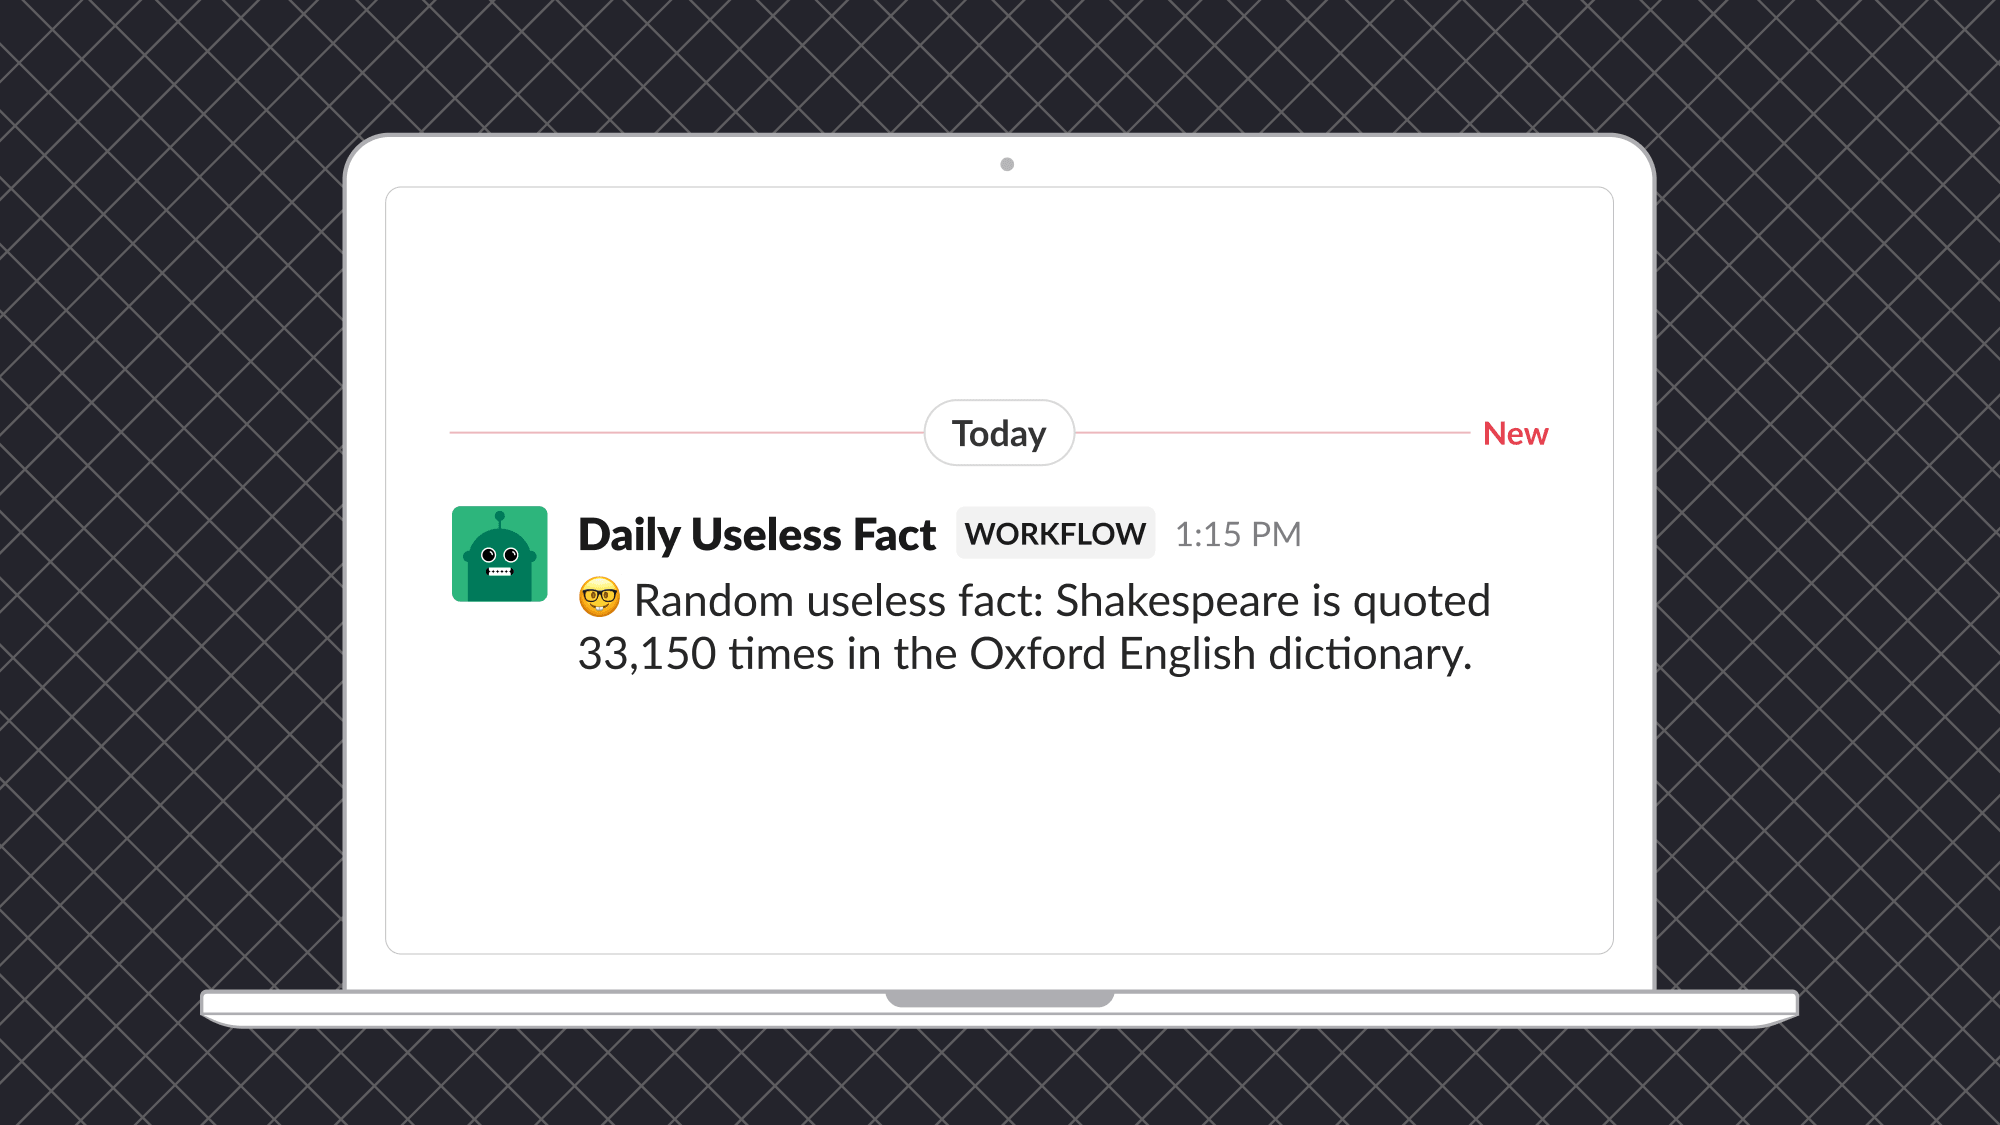
In this workshop, we’ll guide you step by step to create a workflow that automates fetching data from a 3rd-party API and sending a formatted message to a channel with the results. As an example, we’ll use the random useless facts API to post a daily fact to a Slack channel. You’ll learn how to use the Bolt for JavaScript framework to add custom steps to your Slack workspace and incorporate into automations using Workflow Builder.
Let’s get started!
- Log in to your Slack workspace or join the Developer Program to get a free enterprise sandbox.
- Open Your Apps dashboard.
- Click Create New App > From scratch.
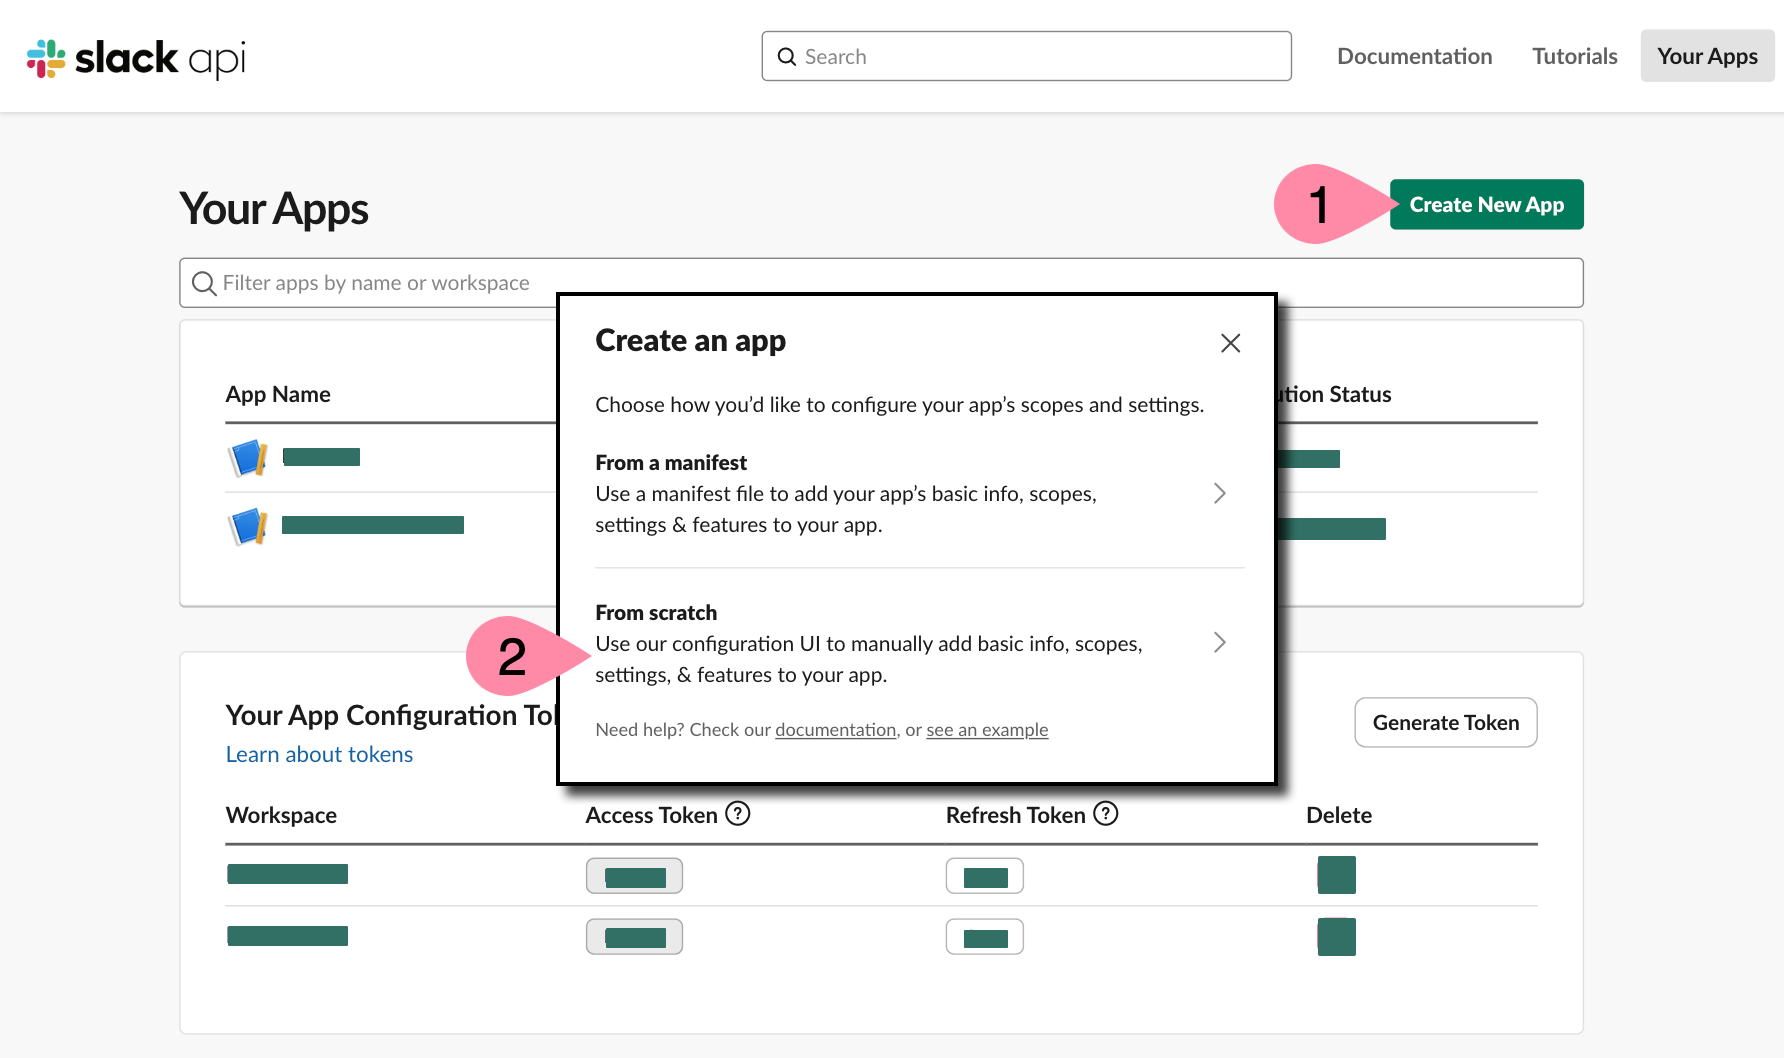
- Add a name for your app, such as “Useless Fact App” (you can update it later).
- Select the workspace where you want to install your app (e.g., the sandbox you created).
- Click Create App.

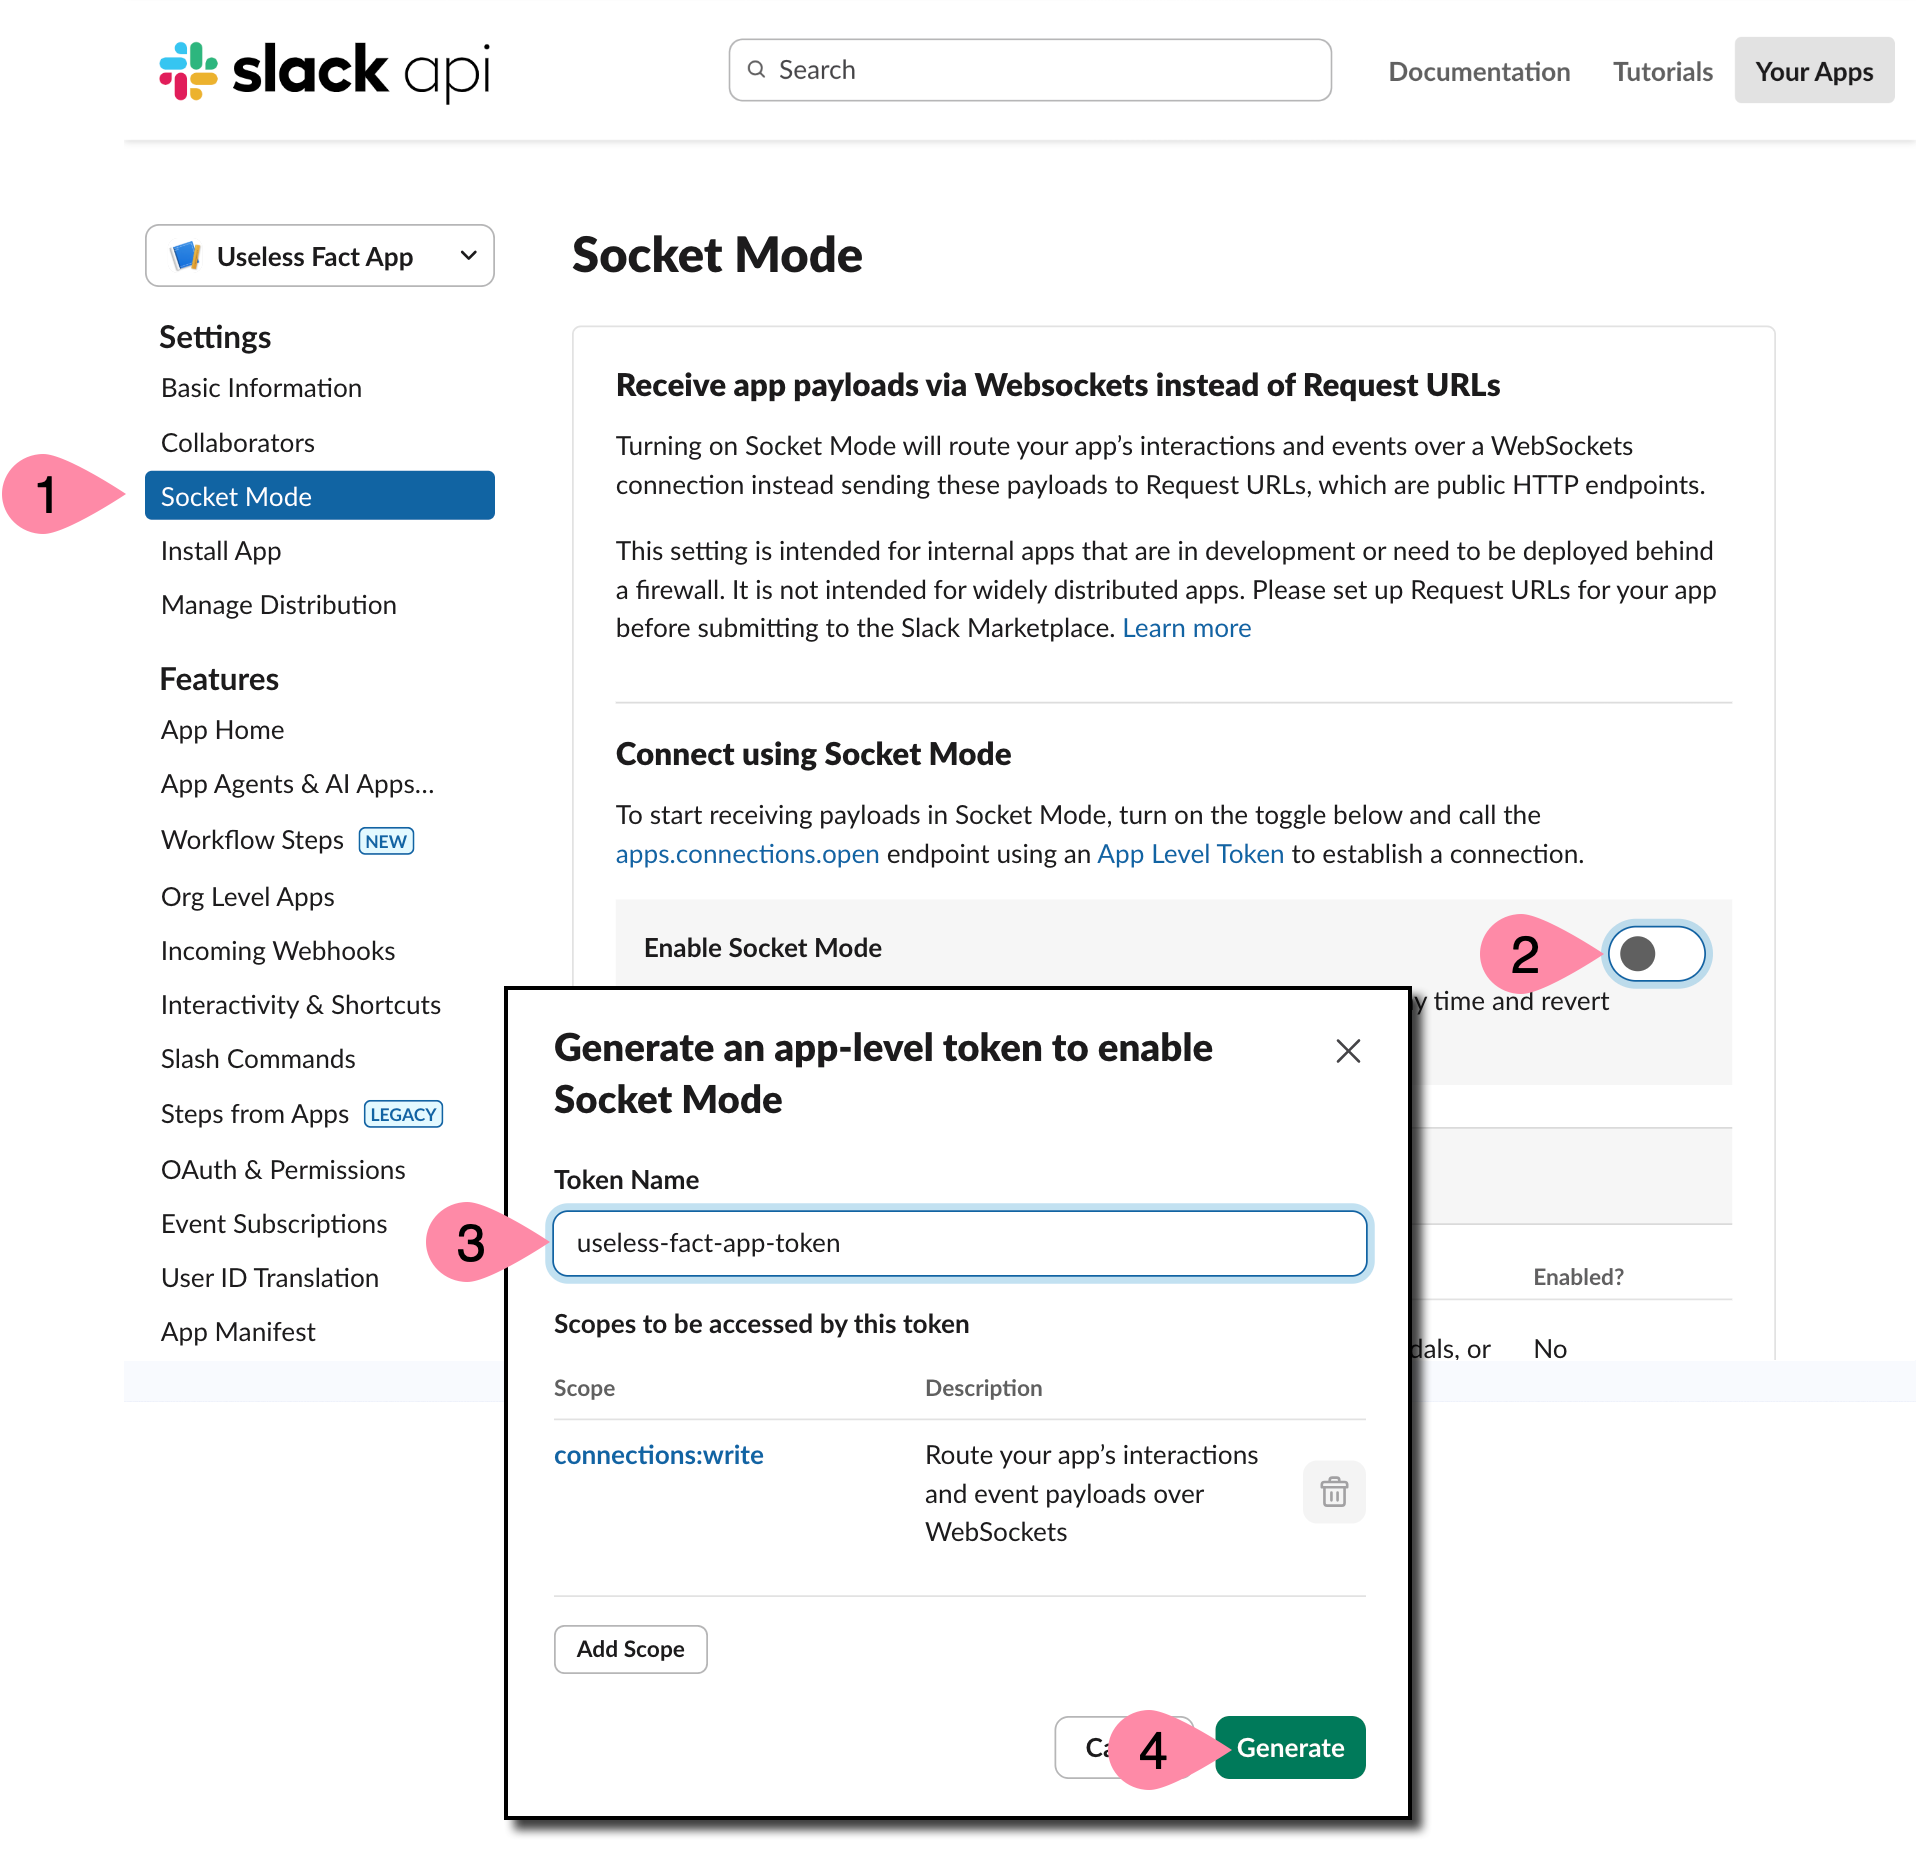
Your app will use Socket Mode to connect to Slack using a dynamic, two-way communication. This simplifies the setup for developing and testing new applications.
- Click Socket Mode on the sidebar.
- Toggle Enable Socket Mode on.
- To enable Socket Mode, you must generate an app-level token. Type “useless-fact-app-token” for the Token Name.
- Click Generate.
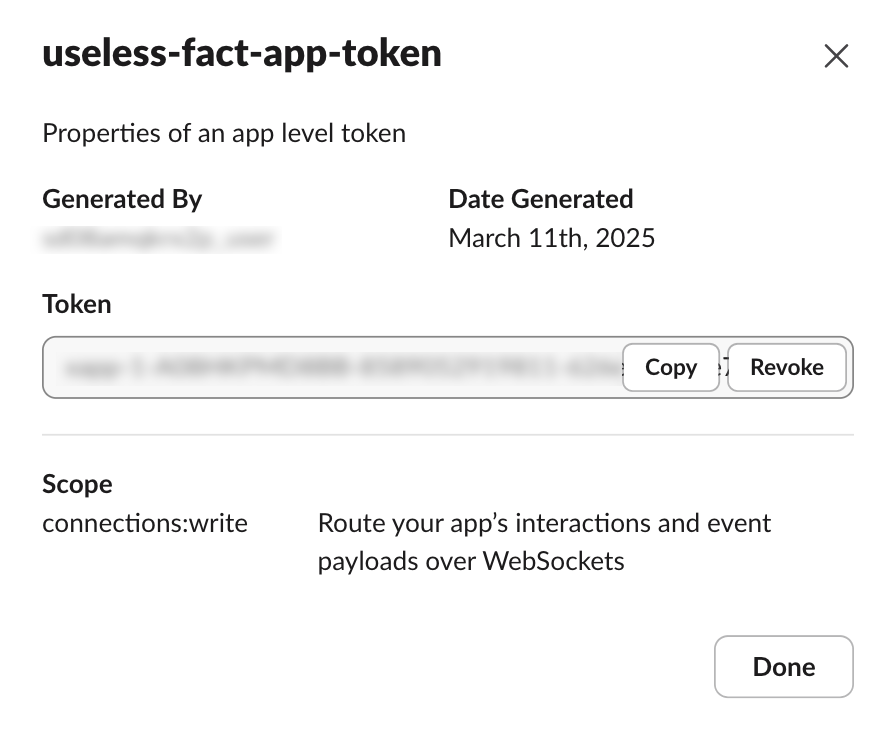
- The new app level token is displayed. You will need this token, but you can copy and paste it in a later step. Click Done.
All apps built for Slack have an app manifest. This is the configuration for the app, such as the name, settings, and required permissions. The app manifest also describes any functions (custom code) your app will make available to your Slack workspace. It’s important to note the following app manifest includes a function named useless_fact_step and declares the function returns one value named “Fact” as its output.
- Click App Manifest on the sidebar.
- Copy the following app manifest and update your default app manifest. Update the name “Useless Fact App” if you used a different name.
{ "display_information": { "name": "Useless Fact App" }, "features": { "app_home": { "home_tab_enabled": true, "messages_tab_enabled": true, "messages_tab_read_only_enabled": true }, "bot_user": { "display_name": "Useless Fact App", "always_online": false } }, "oauth_config": { "scopes": { "bot": ["chat:write", "app_mentions:read", "workflow.steps:execute"] } }, "settings": { "event_subscriptions": { "user_events": ["message.app_home"], "bot_events": ["app_mention", "workflow_step_execute", "function_executed"] }, "interactivity": { "is_enabled": true }, "org_deploy_enabled": true, "socket_mode_enabled": true, "token_rotation_enabled": false, "hermes_app_type": "remote", "function_runtime": "remote" }, "functions": { "useless_fact_step": { "title": "Useless Fact Custom Step", "description": "Runs useless fact step", "input_parameters": {}, "output_parameters": { "message": { "type": "string", "title": "Fact", "description": "A random useless fact", "is_required": true, "name": "message" } } } } } - Save your changes.
Now, install your app to your Slack workspace (sandbox).
- Navigate to Install App in the sidebar.
- Click Install to <Name of your workspace>.
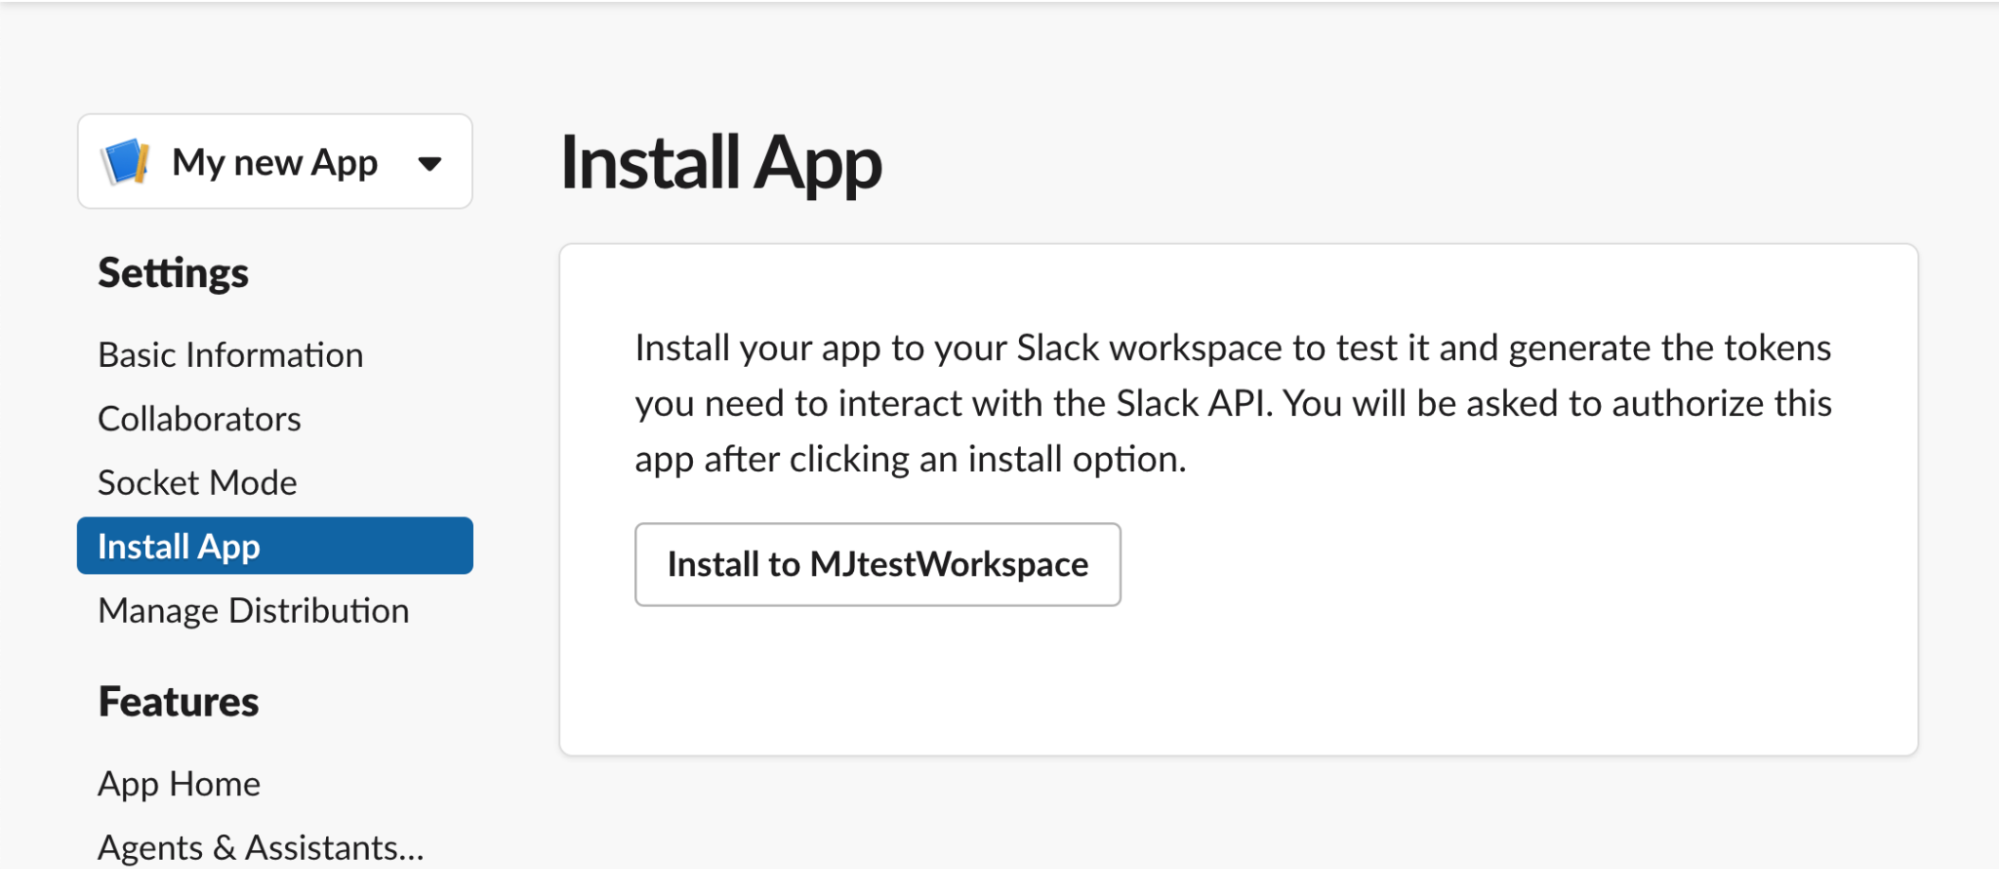
3. Approve the installation and scopes, and it will generate the Bot token for your app to work.
4. Copy the generated bot token for the next step.
With all that preamble done, we can get to the main part of this workshop. There will be for major steps needed to get from the template to the finish line:
- Update the “hi” message to something more interesting and interactive
- Handle when wrong delivery ID button is pressed
- Handle when correct delivery IDs are sent and bring up a modal for more information
- Send the information to all the right places when the form is submitted (including third-party locations!)
All of these steps will require you to use Block Kit Builder, a tool that helps you create messages, modals and other surfaces within Slack. Open Block Kit Builder, take a look and play around! We’ll create some views next.
To start your app, open your terminal and run the following command: npm start.
Your app is now up and running! You can begin interacting with it directly in your Slack workspace.
To create a new workflow, you will need to open Workflow Builder in Slack. You can open Workflow Builder using one of the following methods.
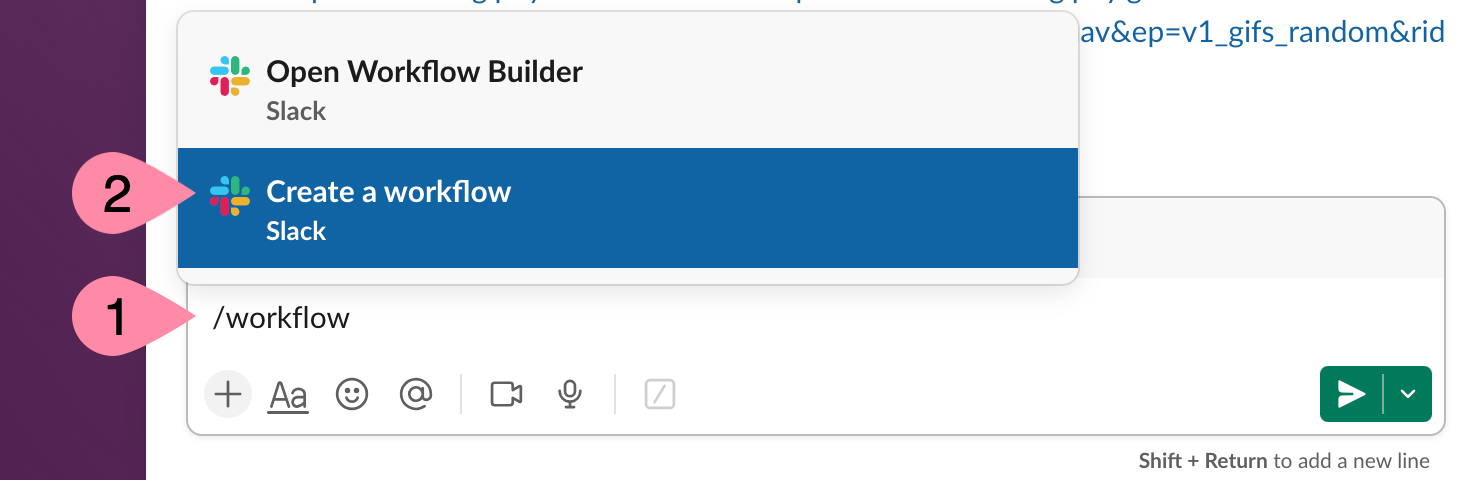
Option 1: Use the message box
In any channel, write: /workflow and select Create a new workflow
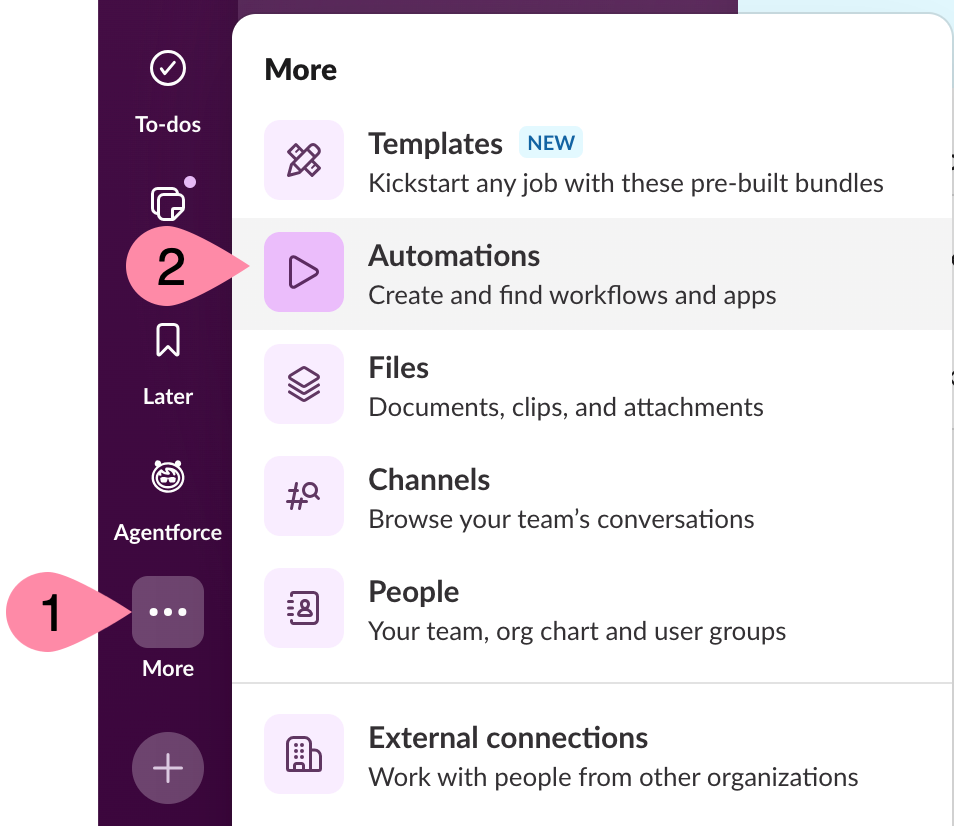
Option 2: Use the sidebar
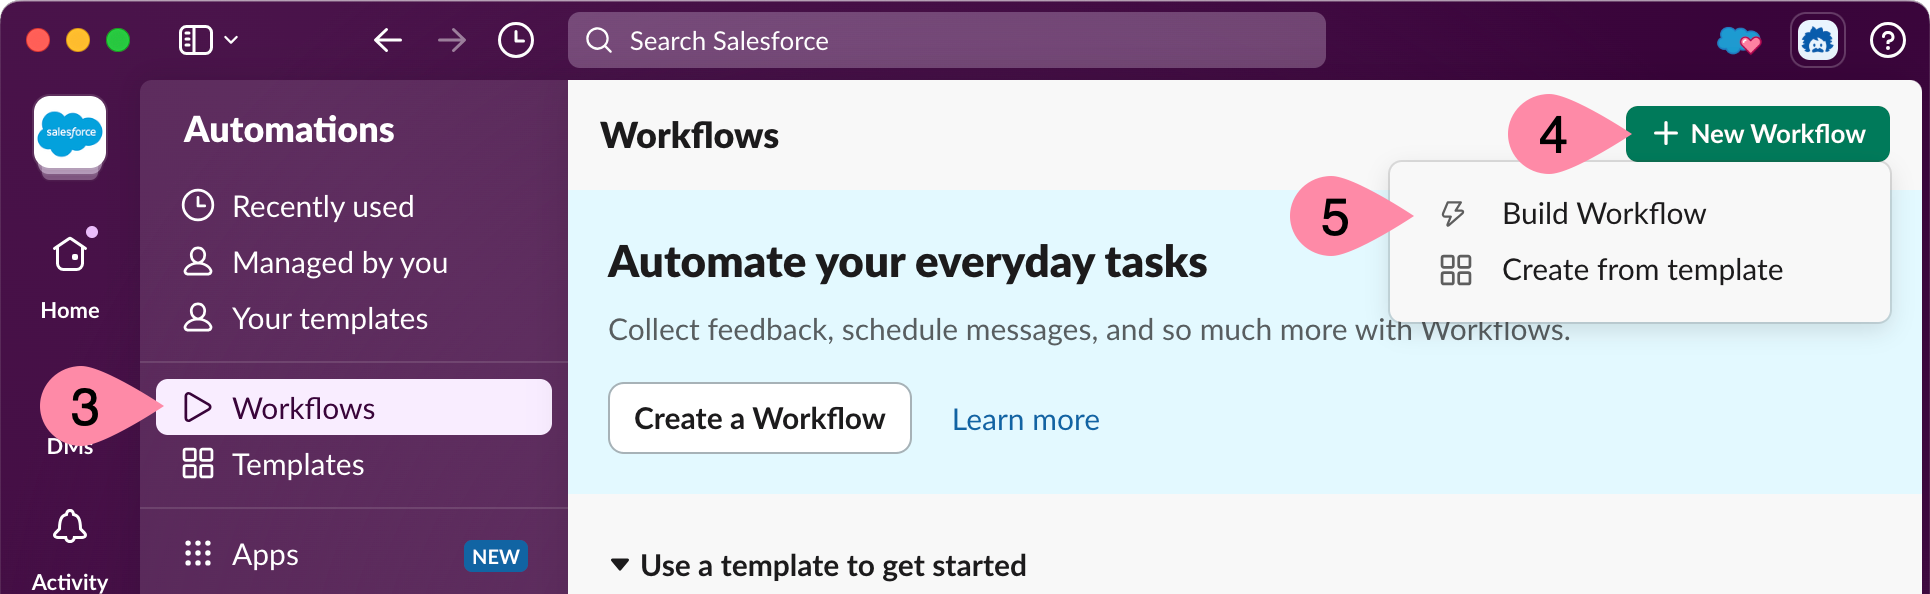
- Navigate to the left sidebar and click More > Automations > Workflows
- Click +New Workflow > Build Workflow
Now that we’ve tested and verified the workflow, uh… works, let’s schedule it so it appears in the team’s channel every day at a specific time.
Once a workflow has been published, the type of trigger that starts the workflow cannot be changed. So, we will need to duplicate the workflow and edit the copy instead.
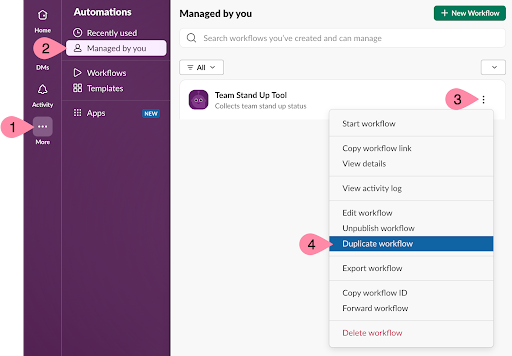
- Click the More button in the left navigation bar and click Automations
- Click Managed by you
- Next to the Team Stand Up Tool click the three dots and choose Duplicate workflow
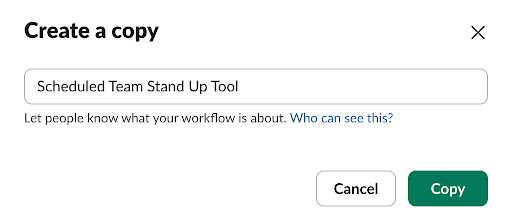
- Give the new workflow a unique name such as “Scheduled Team Stand Up Tool” and click Copy
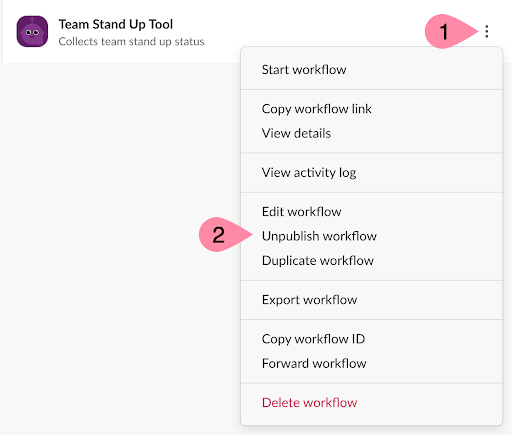
- (Optional) To avoid potential confusion, click the three dots next to the original workflow and click Unpublish workflow
- Next to the new workflow click the Edit workflow icon

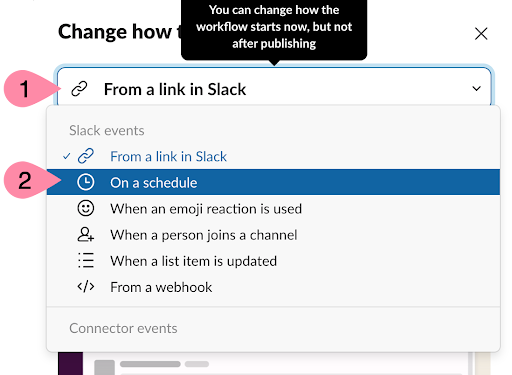
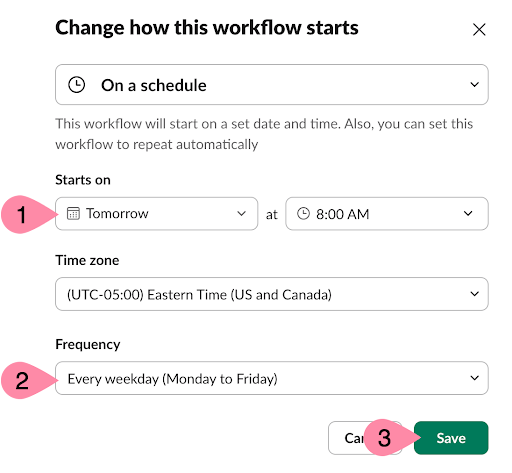
- Under Start the workflow… click the Edit icon

- Click the drop down that currently reads From a link in Slack and select On a schedule
- Change the Starts on to the desired date and time, change the Frequency to Every weekday, and click Save
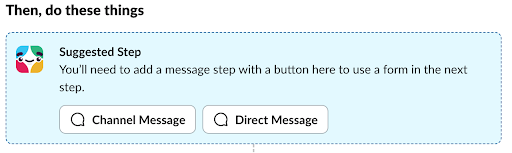
- Now click Channel Message to update the message that will be sent to the team channel when the scheduled workflow is triggered
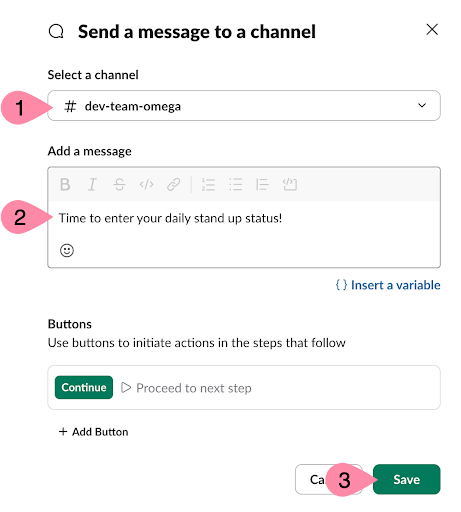
- Under Select a channel choose your team’s channel, under Add a message enter a message such as, “Time to enter your daily stand up status!” and click Save
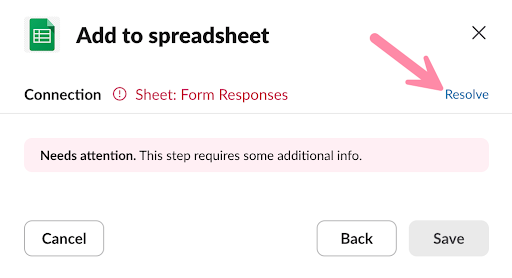
- Click Add to spreadsheet to configure the spreadsheet to collect the form submission
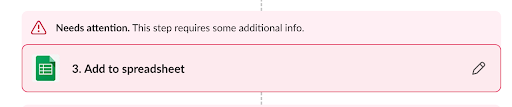
- Click Resolve
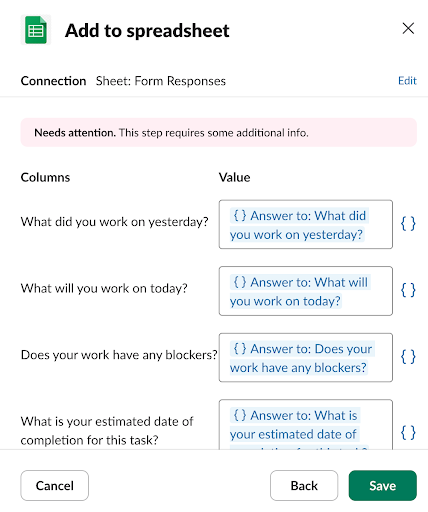
- Click Select a spreadsheet and choose “Stand Up Form” under Create a spreadsheet from a form

- Verify the default Columns and Value settings and click Save
- Next to Sends a message to a channel click the Edit icon
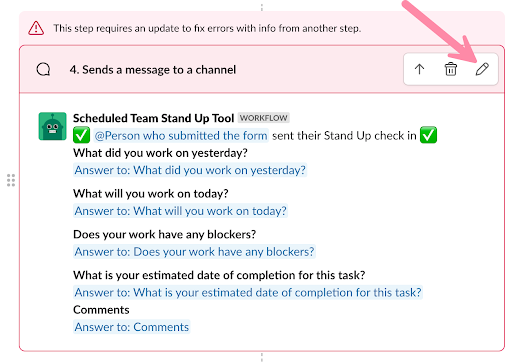
- Verify the team’s channel is selected and click Save

- Click Finish Up and Publish to publish the workflow

When the date and time of the scheduled trigger comes around, you should see the workflow post a message in the team’s channel.
TIP: Although you can’t change the type of trigger after a workflow is published, you can change a scheduled trigger’s time after it is published.
After the workflow is triggered, the next step is to call the function in the Bolt app. This is done using a custom step.
- Click + Add steps.
- Click Search steps…
- In the search box, start typing the name of your Bolt app.
- Click Useless Fact Custom Step.
- Click Save.

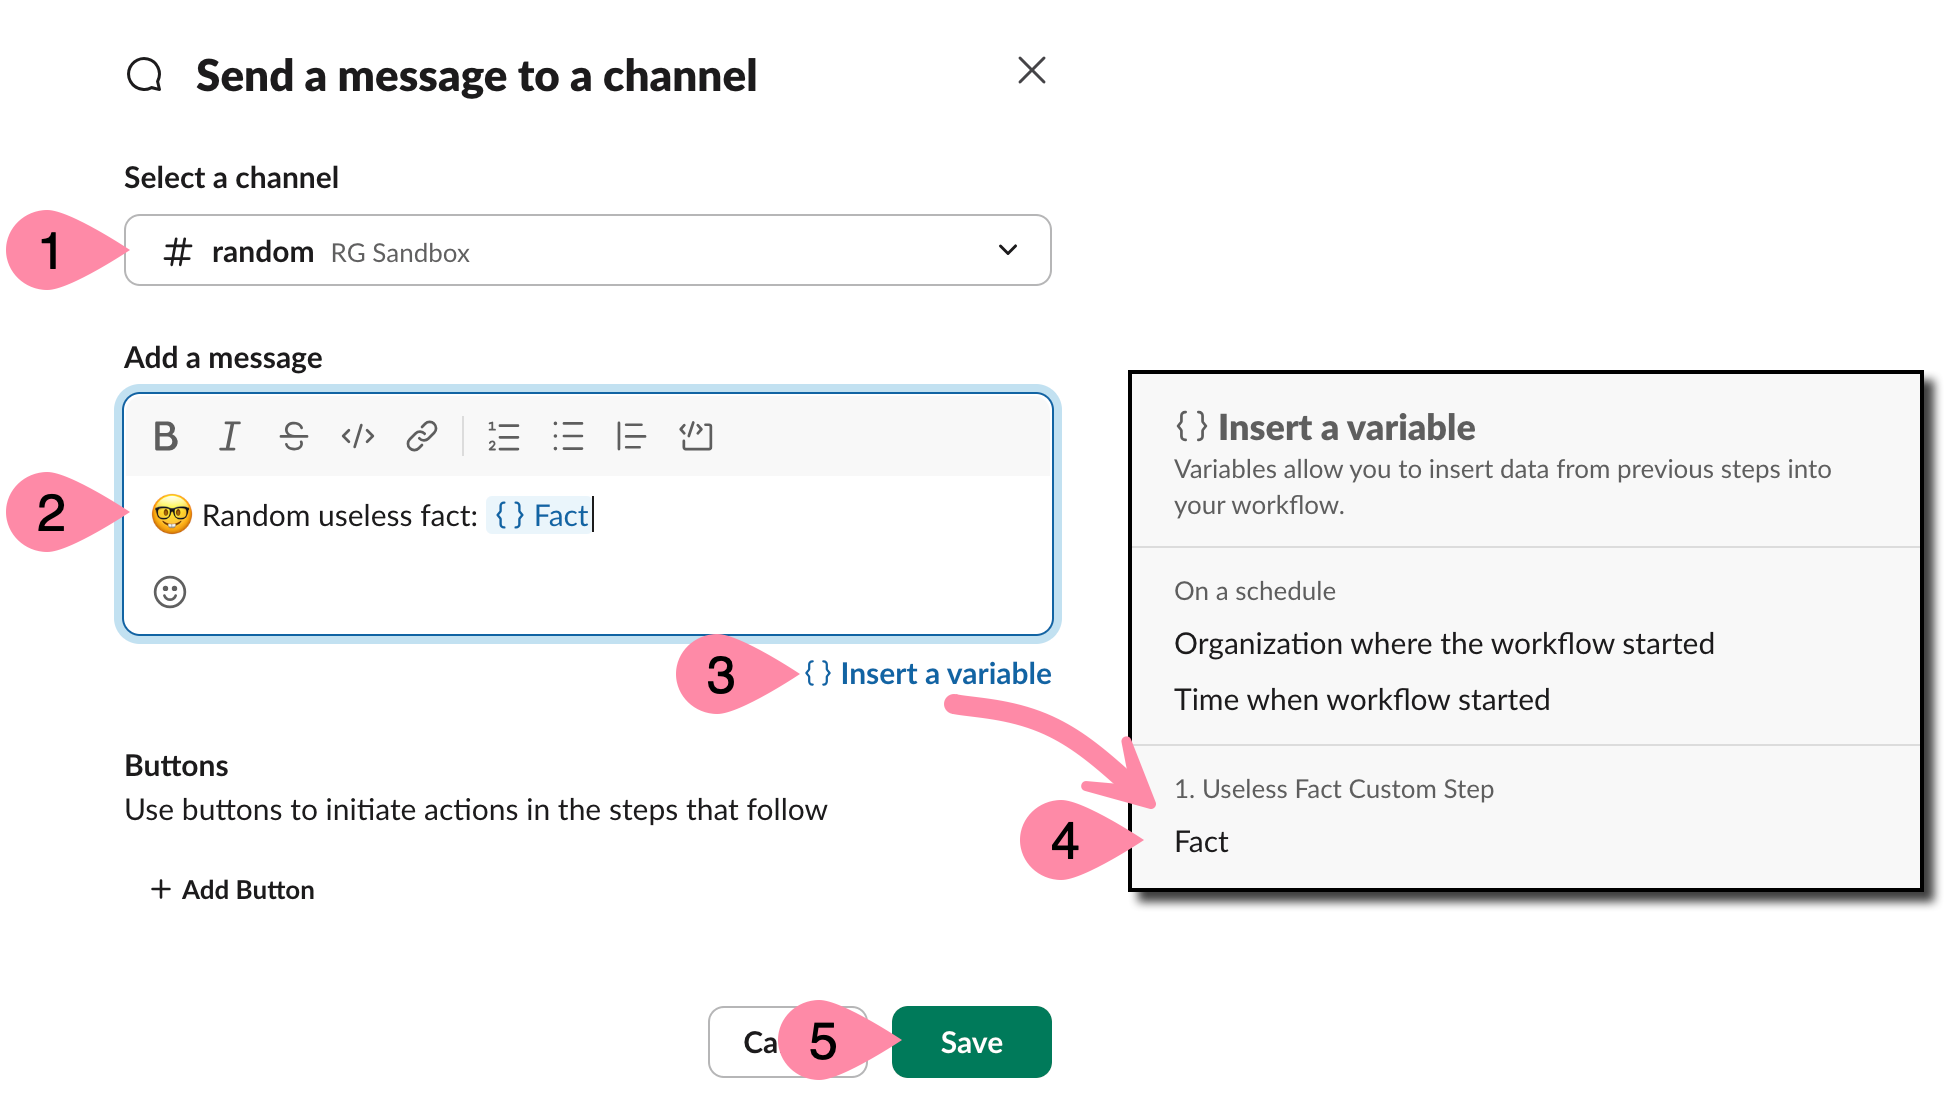
After calling the Bolt app and retrieving a random fact, the next step is to send a message to a channel.
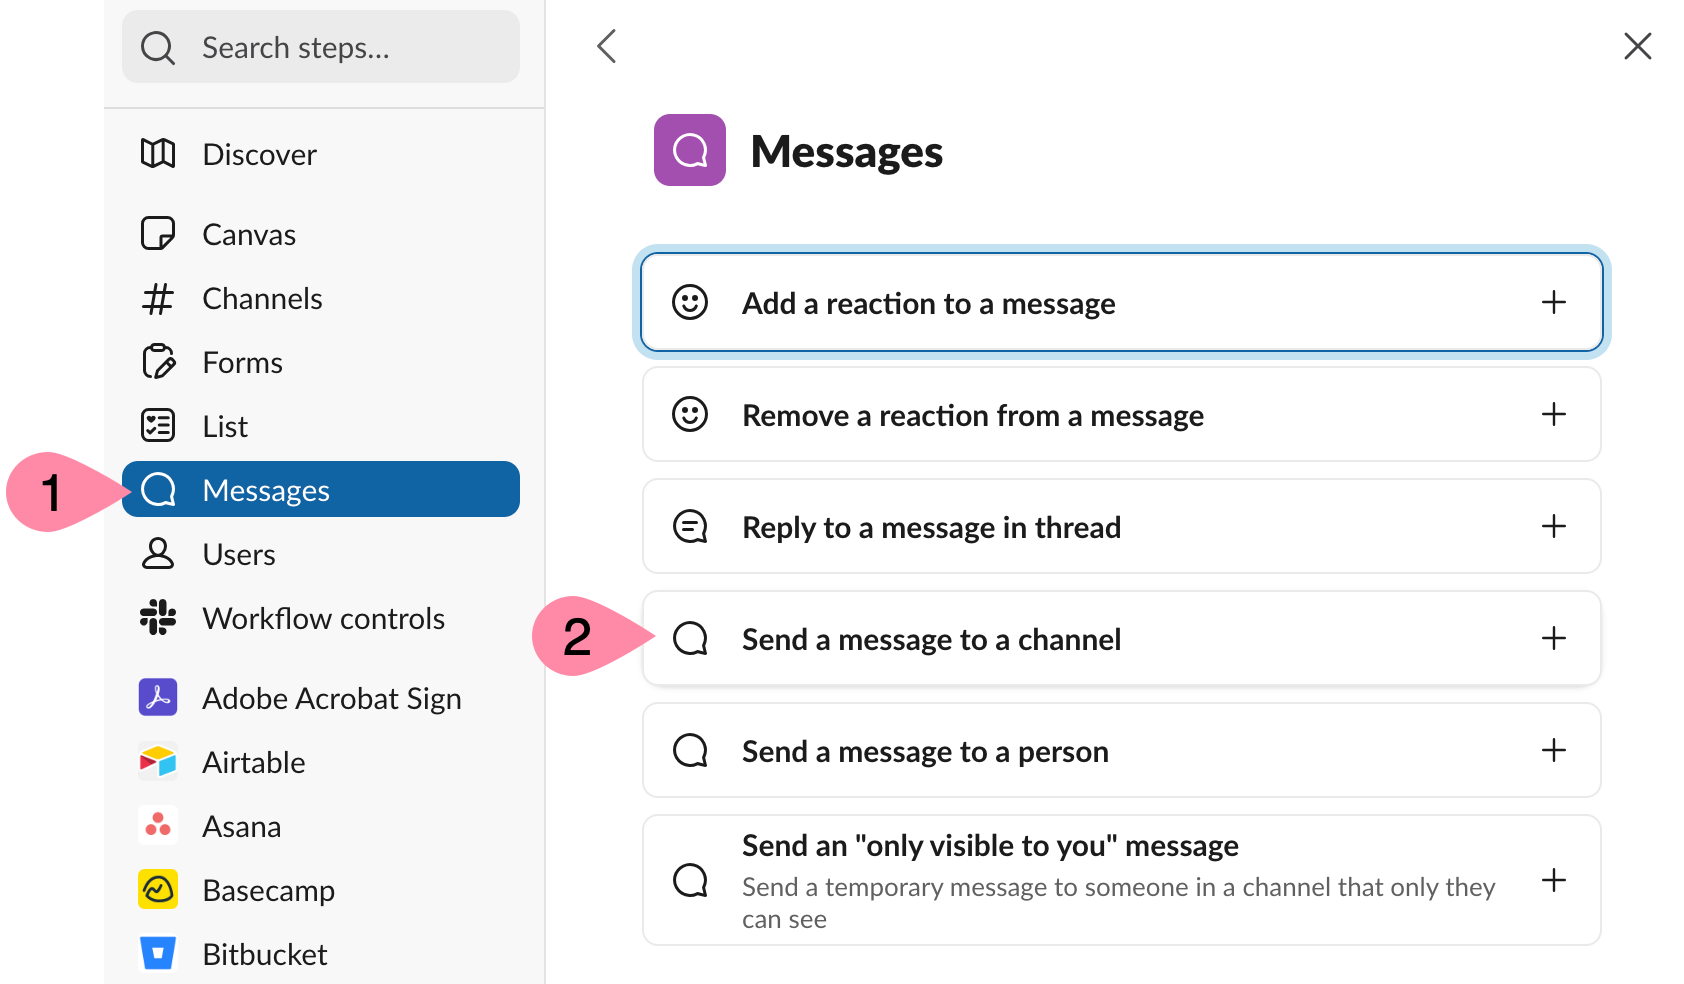
- Click + Add Step.
- Click Messages and then click Send a message to a channel.
- Click Select a channel and choose a channel to send a message.
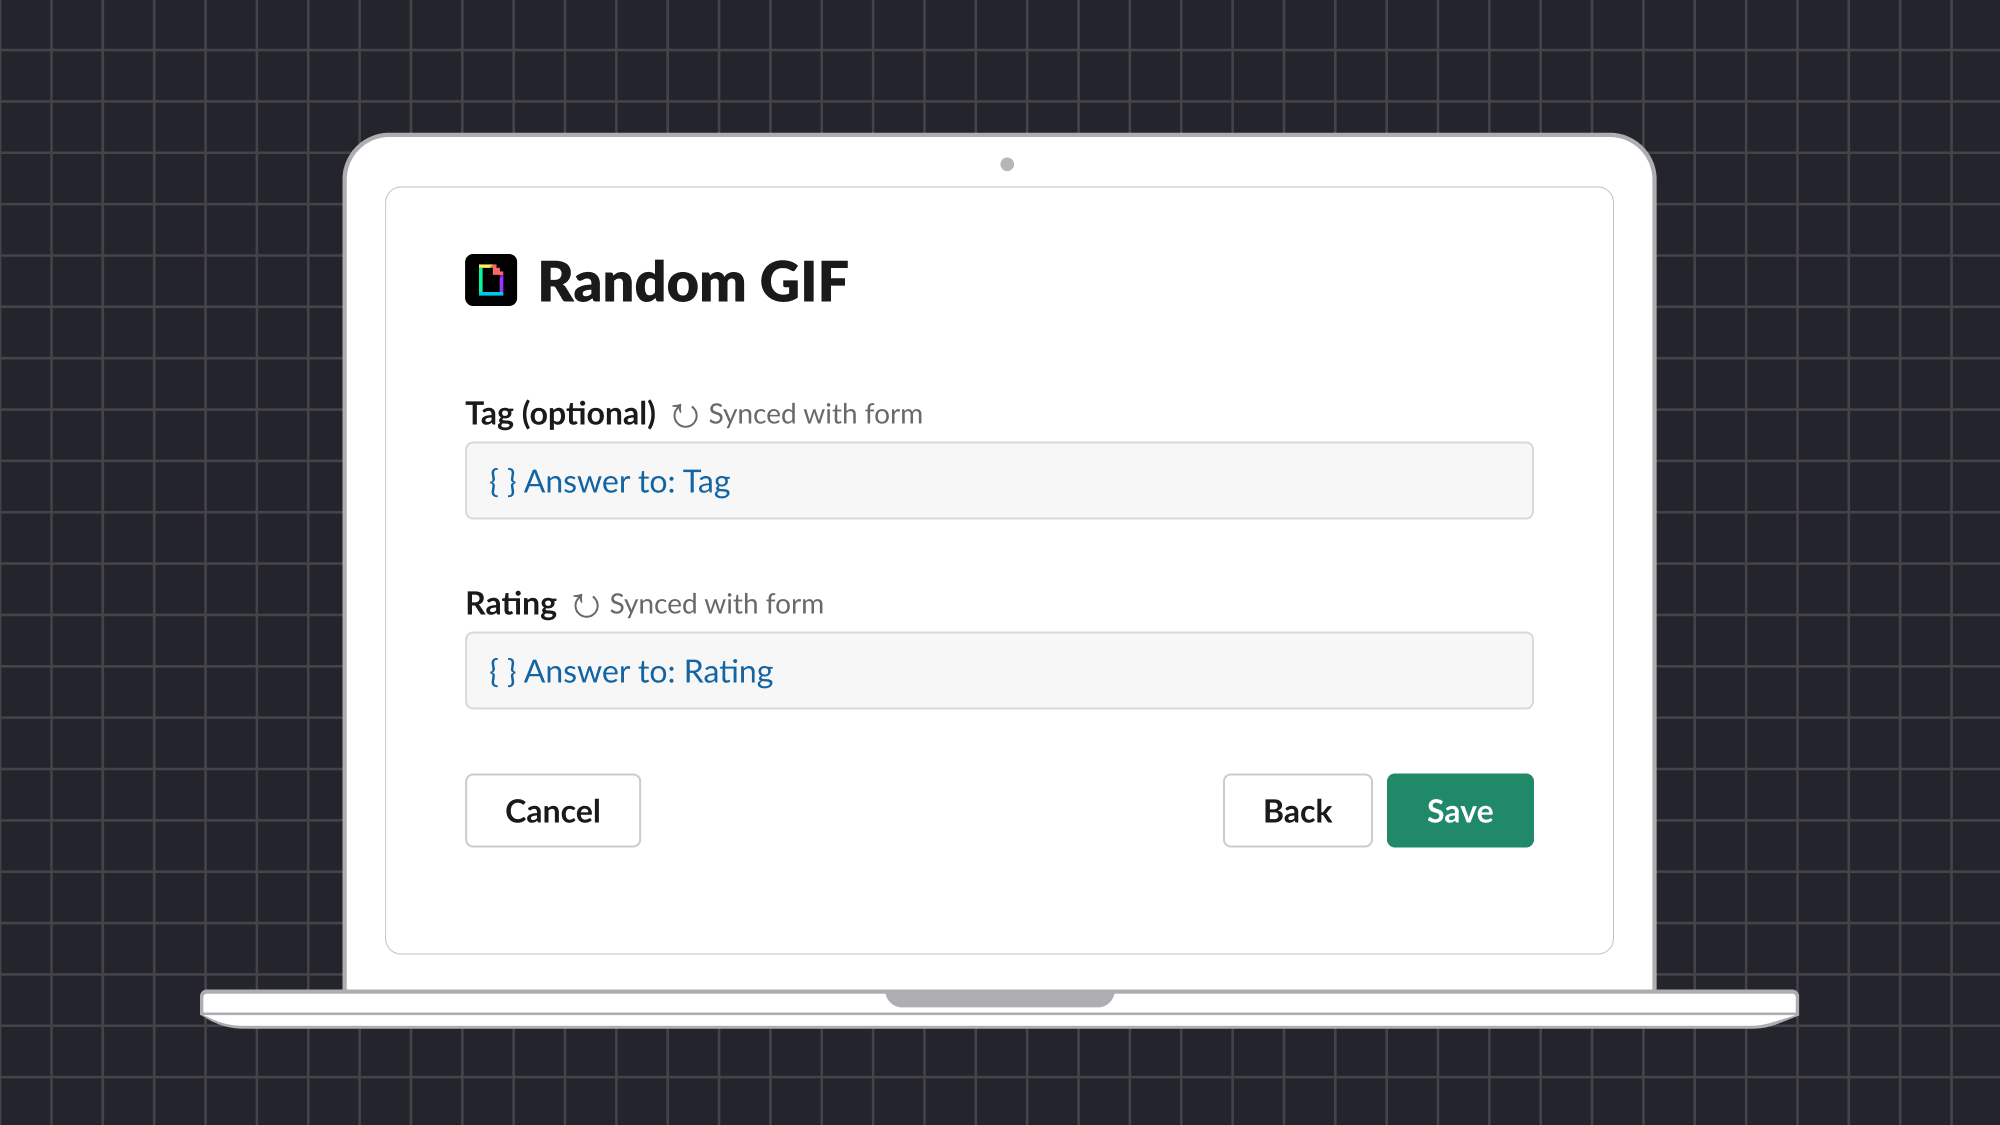
- Under Add a message, type something like “
 Random useless fact:”
 - Click {} Insert a variable and then select Fact under 1. Useless Fact Custom Step.
- Click Save.
Almost there! The final task is to publish the workflow and wait for the next scheduled run to see it in action!
- Click Finish Up.
- Enter a Name, such as “Daily Useless Fact”
- Update the Description.
- Click Publish.
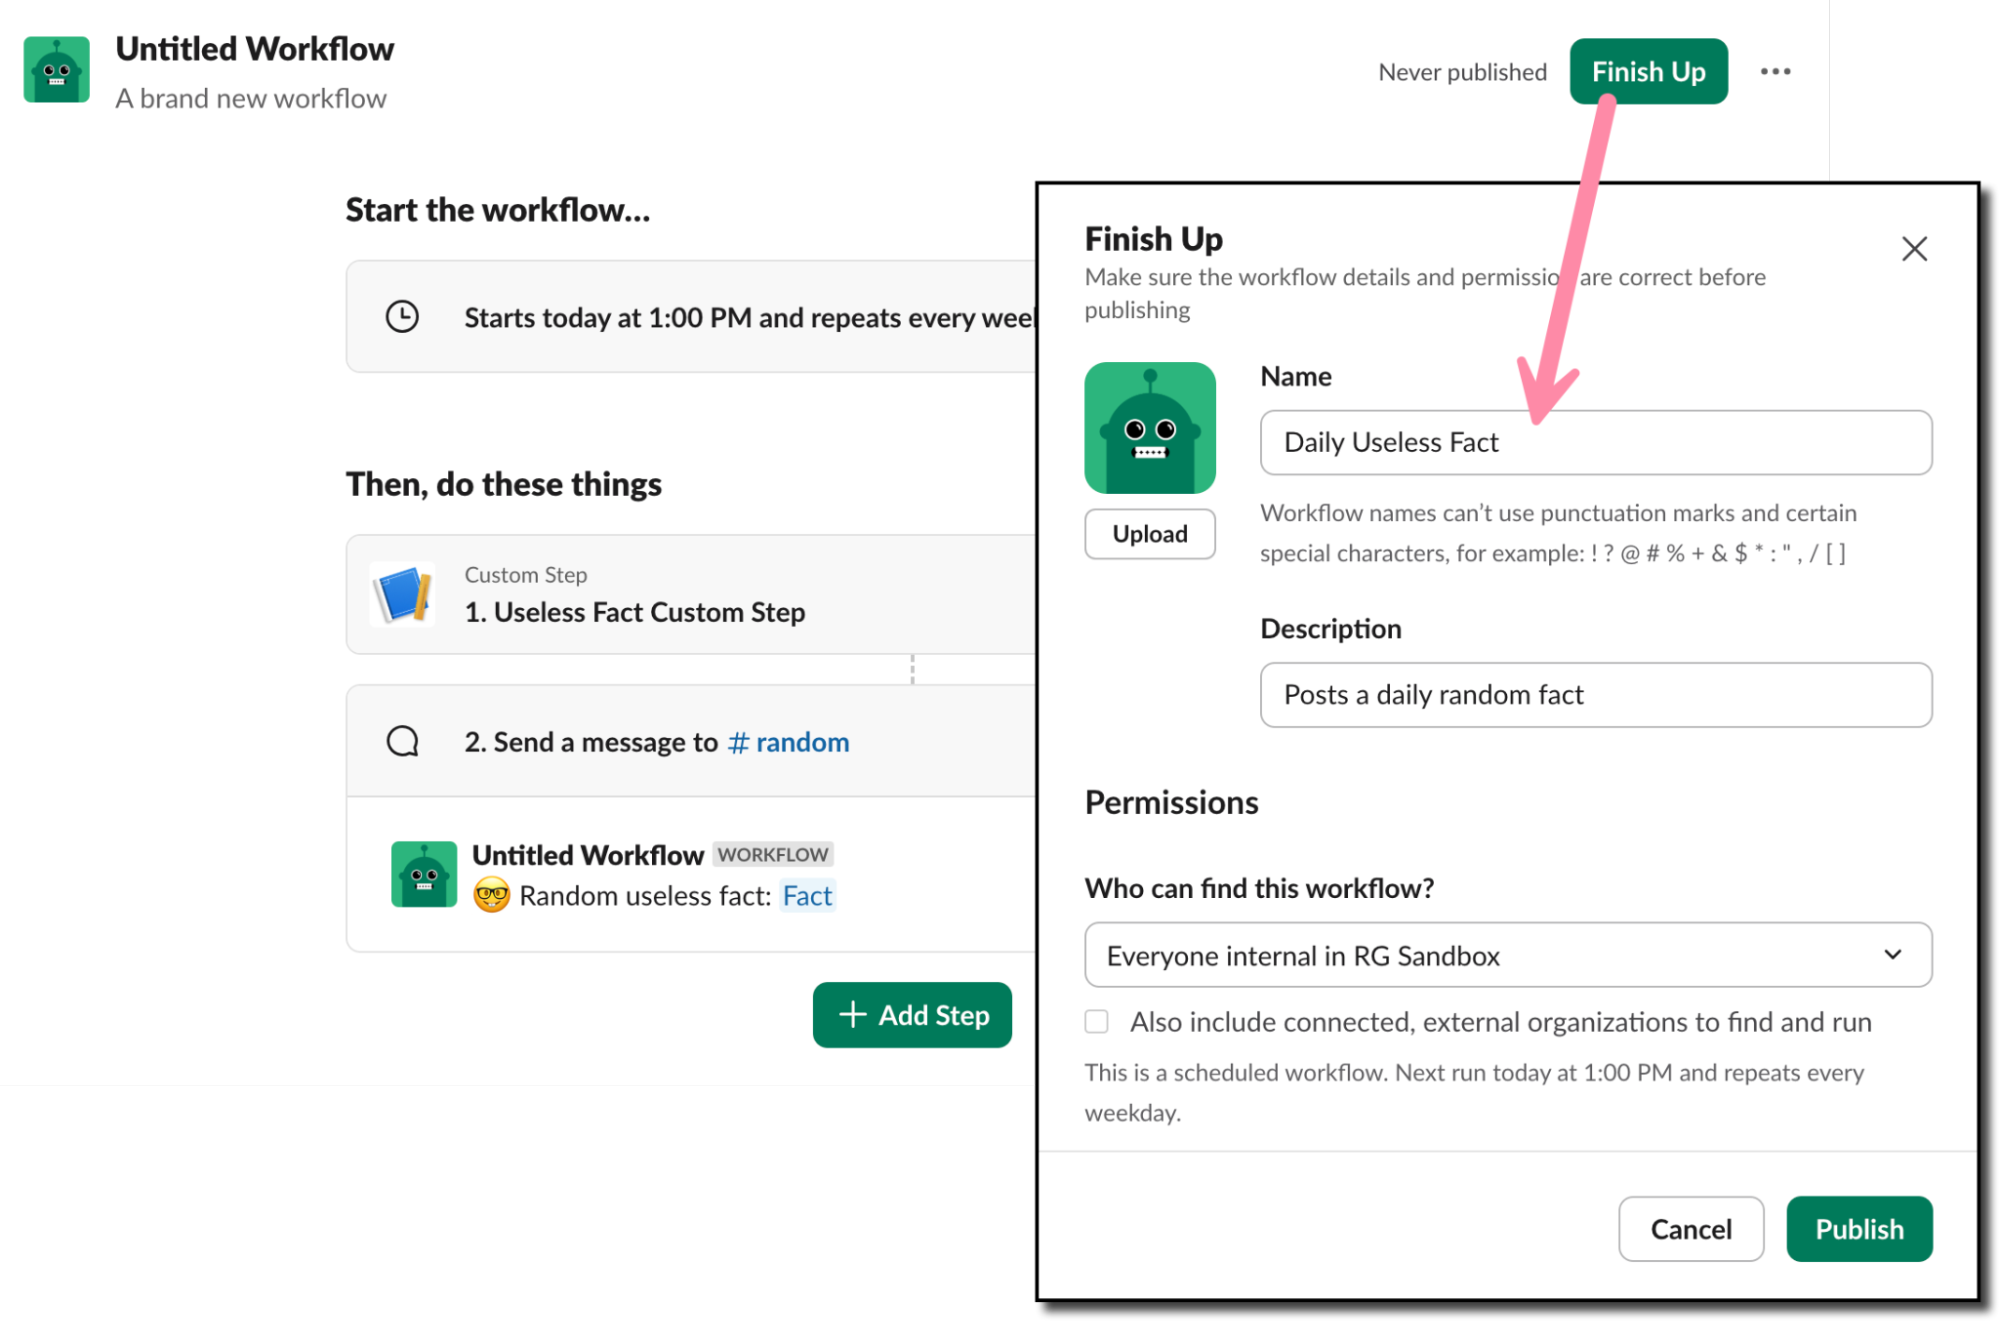
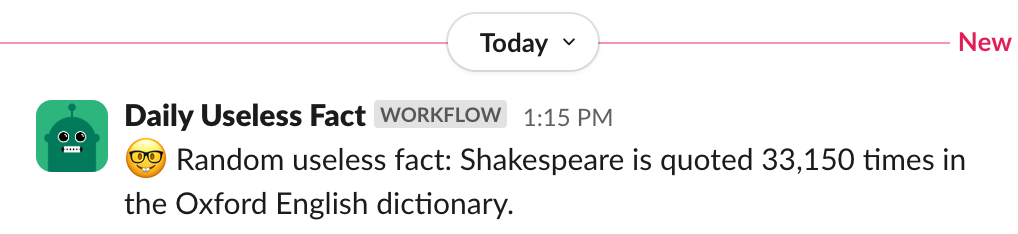
- Wait for the scheduled time and see your new custom Bolt app in action!
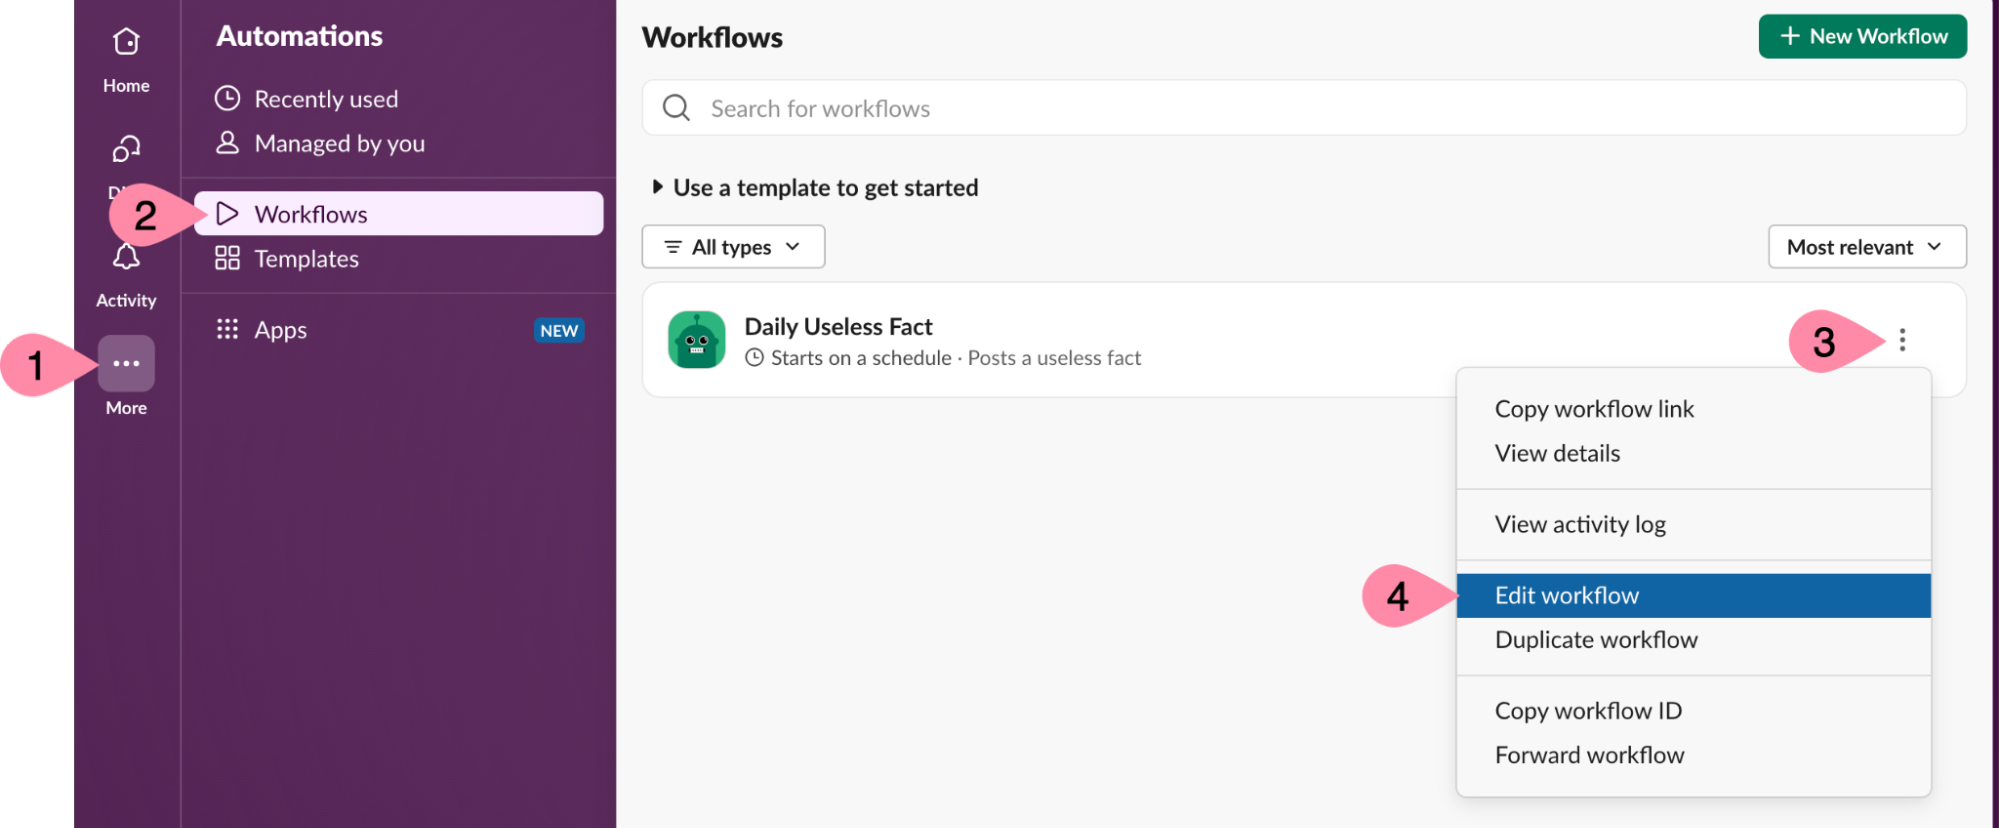
If needed, you can always make changes to your workflow, such as the schedule, channel, or message.
- Click More -> Automations -> Workflows.
- Find your workflow and click the three vertical dots on the right side.
- Click Edit workflow.
Congratulations! You’ve learned how to create a Bolt app using the Bolt for JavaScript framework and a daily scheduled workflow using Workflow Builder!
The Bolt app will continue to work as long as you have it running on your computer. This is fine for development and testing purposes, but a better long-term solution is deploy the application to a production environment. You can follow the guides available for Deploying to AWS Lambda or Deploying to Heroku for steps on deploying to those environments, or deploy to any platform that supports JavaScript serverless functions or Node.js applications.